This is an old revision of the document!
Table of Contents
Setup Guide
Requirements
- Be invited to our Discord (by another member)
- Arma III, DLC is optional but highly recommened
- The Teamspeak 3 Client
Getting the Modset
1. Installing Arma3Sync
 Arma3Sync is a third-party Arma 3 launcher that solves many of the problems from installing large mods through the Steam Workshop on the default launcher. As such, we use it to manage the Chillsim con Chazzie modset.
- Download Arma3Sync here. The default options are fine in the installer.
- Navigate to the Arma3Sync directory (it defaults to
C:\Program Files (x86)\ArmA3Sync), right click on the Arma3Sync.exe, select “Properties” and check “Run this program as an administrator”2). - Open Arma3Sync and allow it to update if it needs to.
2. Configuring the Arma 3 Folder
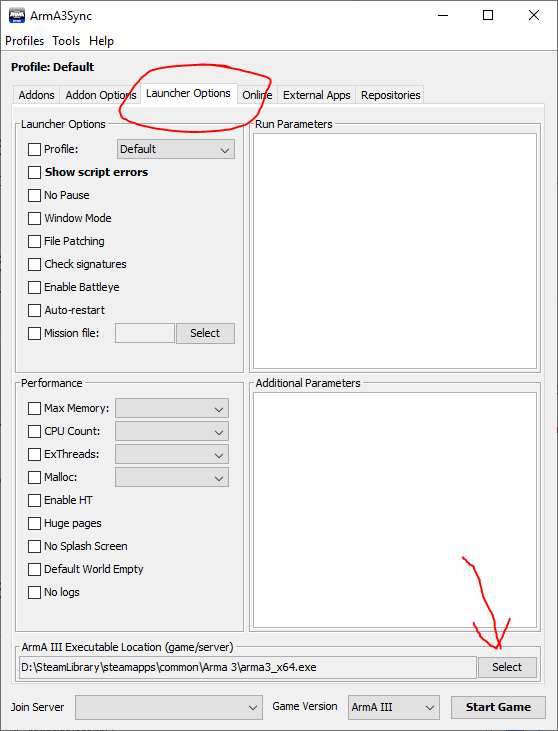
- Wait for a Configuration prompt to appear that asks for an “ArmA 3 executable”. If it doesn't show up, click the “Launcher Options” button at the top and continue.
- Click the “Select” button and find your ArmA 3 executable (be sure you choose the x64 one). If you installed it on the default location through Steam, it should be in
C:\Program Files (x86)\Steam\steamapps\common\Arma 3\arma3_x64.exe.
3. Making a Mod Folder
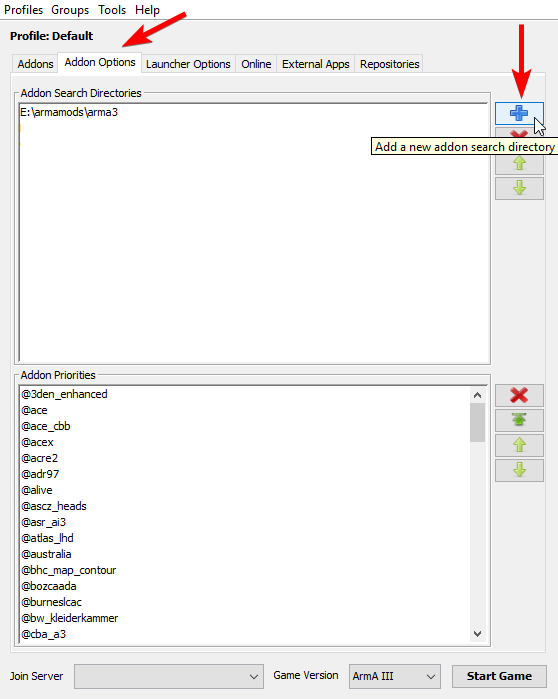 Arma3Sync lets you choose where your mods can be installed to, separate of where Arma itself is installed. The modset is big (>20 GB) so choose a spot in your File Explorer that has plenty of space. I'd recommend on a separate hard drive if you have one, otherwise making a folder in the Documents folder or on the Desktop is good.
- Once you chose where you want your mods to be stored at, make a folder there and call it
CCCMods. - Then, in Arma3Sync, click on the “Addon Options” tab, and press the blue plus sign on the right.
- In the window, navigate to where you created the
CCCModsfolder and confirm it.
4. Adding the Repositories
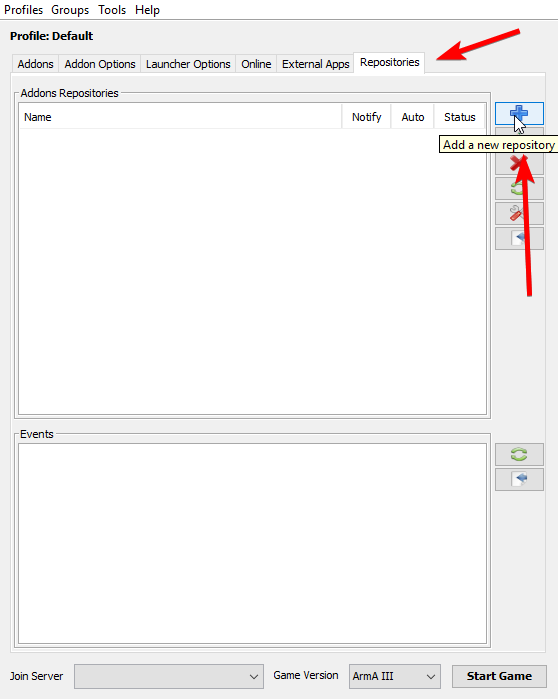
 For each module you want to install:
- Look at the next section! It's labeled "List of Modules."
- In the list of modules, copy the Auto-Config URL of the module you want to add to Arma3Sync into the clipboard.
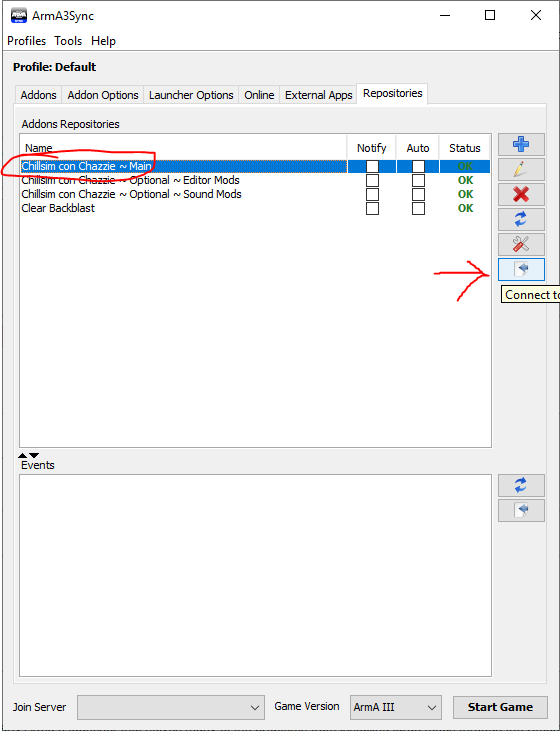
- Click on the “Repositories” tab, and then click the blue plus to add a Chillsim con Chazzie repository.
- Paste the URL into the “Public auto-config URL“ box.
- Click the “Import” button, and then press “OK”.
List of Modules
I split the modset into a few modules. You must install the Main module to play, everything else is optional and you can install them if you want :)
Required
- Chillsim con Chazzie ~ Main: https://epix.icu/arma/main/.a3s/autoconfig
- The main modset for our playsessions.
Optional

- Chillsim con Chazzie ~ Optional ~ Sound Mods: https://epix.icu/arma/opt_sound/.a3s/autoconfig
- Clientside sound mods to immerse yourself more. Shave off a few gigs of storage if you don't care about this.
- Chillsim con Chazzie ~ Optional ~ Editor Mods: https://epix.icu/arma/opt_editor/.a3s/autoconfig
- Mods that improve the map making experience. Only need it if you want to make your own missions.
5. Downloading the Mods
- In the “Addons Repositories” list, select the repository you just added.
- On the right side, click on “Connect to repository.”
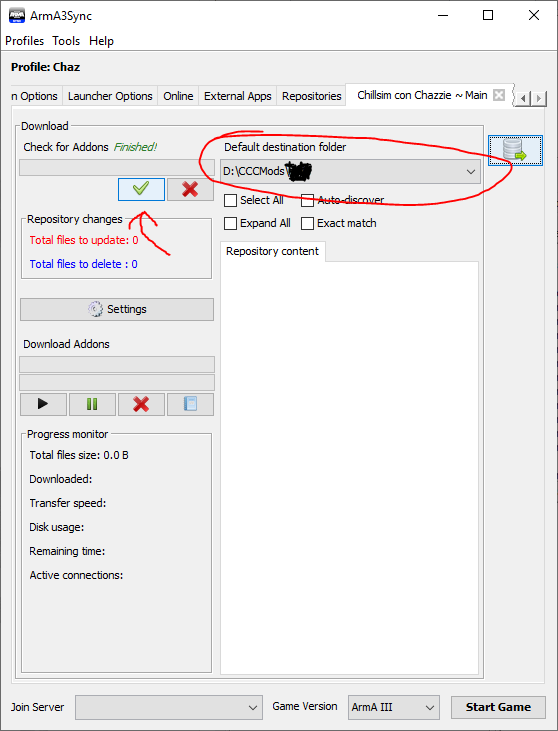
- A new tab will appear with the repository's name.
- Click “Default Destination Folder” and be sure it's set to your
CCCModsfolder. - Finally press the green checkmark and allow Arma3Sync to check the empty addons folder.
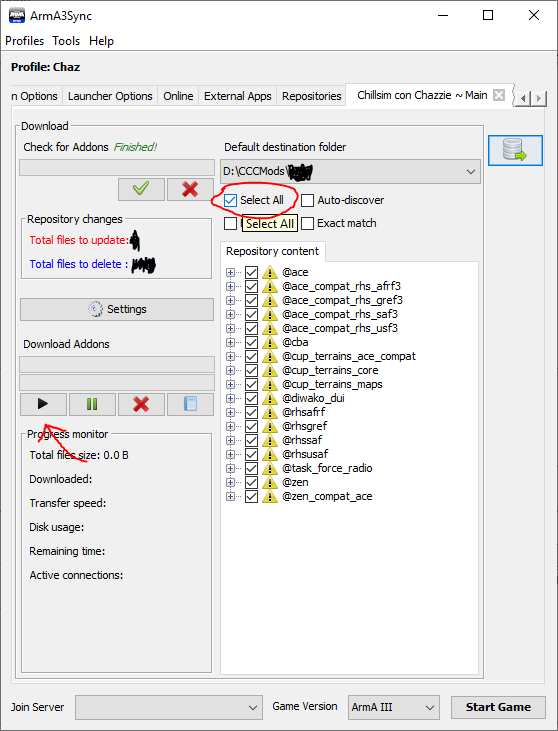
- Once Arma3Sync is finished checking, you need to check the “Select All” checkbox.
- Check the
Total files to update:, it should list a fair bit of files to download. - Double check all the settings are correct.
- Double double check :)
- Go ahead and press the Start button under “Download Addons”.
This will begin downloading all the mods from the repository. As the modset is >20GB, this will probably take awhile so leave your computer on and watch anime while you wait! Its not surprising for this to take overnight if your internet is stupid slow…
P.S. if you added any optional repositories, you gotta repeat this for each one!
6. Loading Mods
- Click the “X” to close the repository tab.
- Switch to the “Addons” tab.
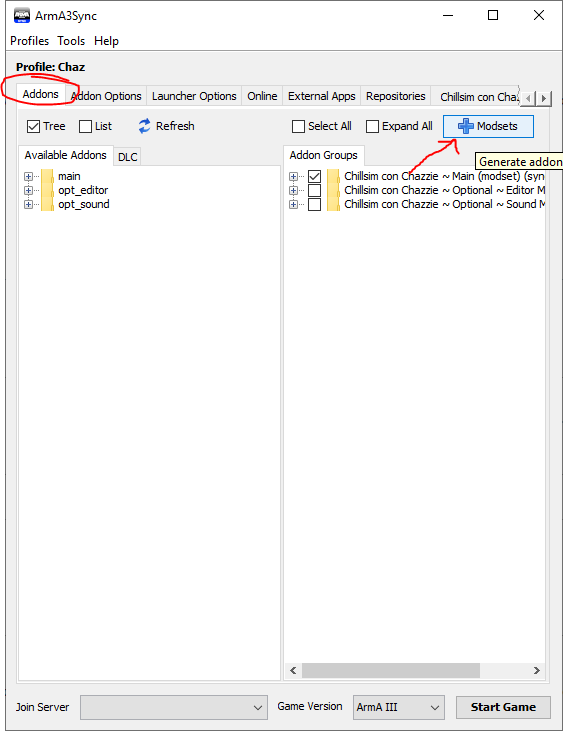
- Then, click “Modsets”.
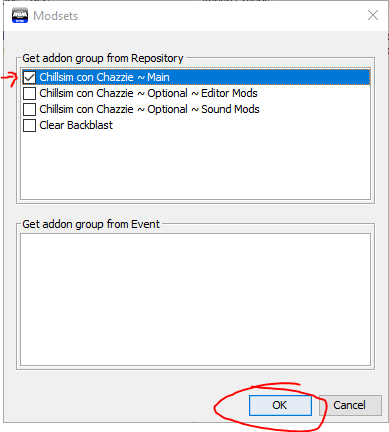 Check the boxes for whatever modules you want to use and hit “OK.”
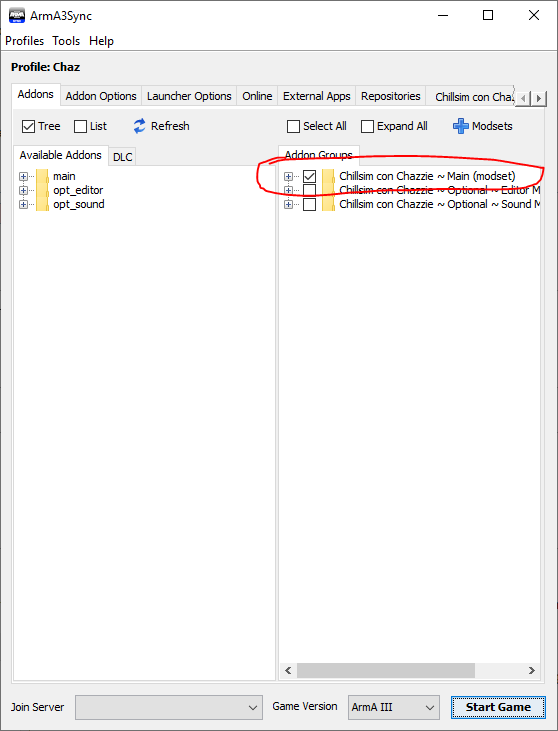 Now back in the main interface check whatever mod groups you want to launch the game with. Bruh finally.
Optional: Set Launch Options
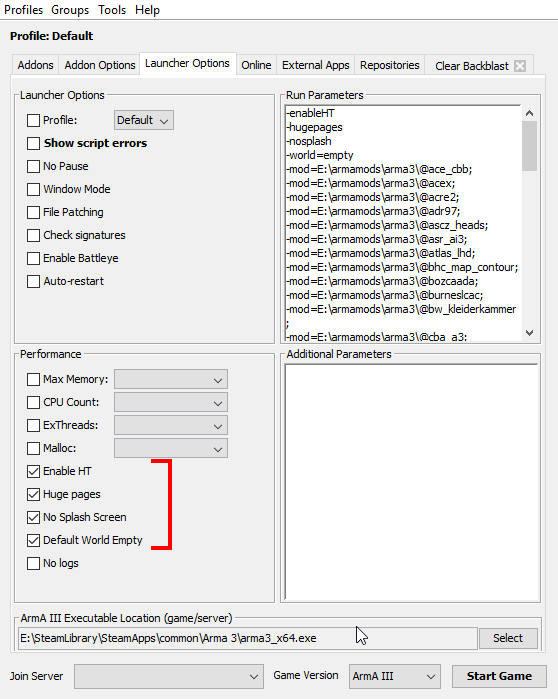 In the “Launcher Options” tab of Arma3Sync, there are some additional checkboxes to get into the game faster, bypassing the splash screen and preventing some of the behind-the-menu animations. They're listed in the image to the left.
